This cinnamon raisin sourdough bread recipe is naturally leavened, packed with warm cinnamon, sweet brown sugar, and plump raisins, and perfect for breakfast or snacking. Learn how to make a beautiful, flavorful loaf with a chewy crumb and golden crust—no commercial yeast needed!

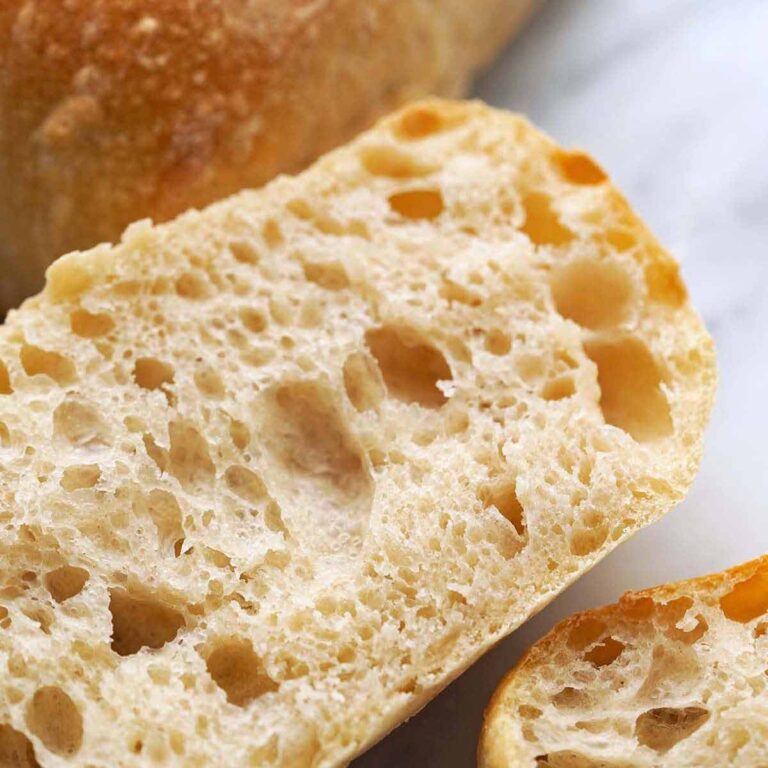
If you love the complex flavor of sourdough and the sweet warmth of cinnamon, brown sugar, and raisins, this bread recipe is for you! This naturally leavened loaf has a chewy, yet soft and light crumb, a golden crust, and strikes a beautiful balance of sourdough tang, sweetness, and spice. It reminds me of a cinnamon raisin pastry, but in sourdough bread form.
Skip a trip to the bakery and give this a try! (And if you’re looking for something simple, I have you covered there too with this sourdough sandwich bread recipe.)
Why You’ll Want This Recipe on Repeat
- Versatile and delicious – Enjoy it toasted with butter, as French toast, made into bread pudding, or on its own!
- Deep, well-balanced flavor profile – Unlike store-bought versions, this homemade loaf develops deep, complex flavors through slow fermentation, making it extra delicious and satisfying.
- Customizable – Adjust the sweetness, add nuts, or experiment with different spice blends to make it your own.
Example Sourdough Bakers Schedule For This Recipe – Simplified!
Use this as a general timeframe, but note that exact times can vary.
Day 1
- 11pm: Feed your starter.
Tip: It doesn’t have to be 11pm exactly, just feed it right before you go to bed.
Day 2
- 7am (the next morning): Mix the dough.
- 7:30am-9:30am: Perform 4 sets of stretch and folds spaced 30 minutes apart.
- 9:30am-4:30pm: First rise/complete bulk fermentation (at room temperature).
- 4:30pm: Shape.
- 5pm-7am (the next morning): Second rise/proof (in the fridge).
Tip: Alternatively, you can do the second rise at room temperature for 1 to 4 hours and bake the bread the same day.
Day 3
- 7am-8am: Preheat oven.
- 8am-9am: Bake.
- 4pm: Slice and enjoy!
Cinnamon Raisin Sourdough Bread Ingredients
INGREDIENTS EXPLAINED
Here the ingredients are explained and applicable substitutions are given. For the full recipe (with ingredient amounts), please see the recipe card below.
Ingredients to Feed Your Starter:
- Sourdough starter – Use mature, 100% hydration sourdough starter.
- Unbleached all-purpose flour – Use organic if possible, but definitely unbleached flour (all-purpose is fine).
- Non-chlorinated water – I use bottled spring water because the drinking water where I live is sometimes highly chlorinated.
Raisin Sourdough Bread Ingredients:
- Ripe sourdough starter – Once your starter is fed, you’ll want to use it when it’s around its peak. I usually feed it around 10-11pm the night before I want to bake, and then I mix up my dough around 7-8am the next morning.
- Non-chlorinated water – I use bottled spring water at room temperature. However, it can be slightly warm to encourage fermentation (not hotter than 95 to 100F).
- Honey – Adds a subtle sweetness to the dough that pairs really well with raisins. It helps balance the sourdough’s tangy flavor, but don’t over-do it with the honey or you’ll lose the complex sour notes that we love about sourdough!
- Fine sea salt – So our bread isn’t bland.
- Unbleached bread flour – With its higher protein content than all-purpose flour, bread flour lends a deliciously chewy texture to this loaf.
- Raisins – We soak the raisins in boiling water before mixing them into the sourdough. This allows us to better control the hydration level of the dough and we get plump, juicy raisins in the bread!
Brown Sugar Cinnamon Filling Ingredients:
- Unsalted butter – Soften the butter so you can mix the ingredients thoroughly.
- Light brown sugar – For a sweet swirl that pairs beautifully with raisins.
- Unbleached all-purpose flour – Adds a little structure to our cinnamon brown sugar filling so it doesn’t ooze everywhere.
- Cinnamon – For the most intense flavor, use Saigon cinnamon, also called Vietnamese cinnamon.
- Vanilla extract – Adds another warm flavor note.
- Fine sea salt – Helps create a balanced flavor profile, and enhances the flavor of everything else.

How to Make Cinnamon Raisin Sourdough Bread: Step-by-Step Instructions
Step 1: Feed Your Starter (4 to 12 hours wait time)
Feed your starter so that it’s at peak when you’re planning to make the dough. Around 4 to 12 hours before you want to make the dough is the general timeframe, but you know how long it takes your starter to reach peak after a feeding, so go with that.
To feed your starter, mix all ingredients together in a clean jar. Cover loosely and let it rest at room temperature until it peaks. This usually takes about 4 to 12 hours; I like to do this the night before I want to make the dough, right before I go to bed.
Step 2: Mix the Dough and Soak the Raisins (30 minutes wait time)
- To make the dough, add the starter, water, and honey to a large bowl (with a clear bottom and sides so you can see the dough) and whisk until the starter and honey are fully dissolved. Whisk in the salt. Mix in the flour. The dough will be shaggy at this point (don’t knead it). Cover the bowl and let the dough rest at room temperature for 30 minutes.
- While the dough is resting, add the raisins and 1 cup of boiling water to a bowl. Make sure raisins are submerged, and soak 20 to 30 minutes.
Step 3: Add the Raisins and Perform the Stretch and Folds (90 minutes wait time)
- After the dough has rested for 30 minutes, drain the raisins, gently pat them dry, and sprinkle them onto the dough.
- Wet your hands and perform your first set of stretch and folds. To do so, grab a piece of dough, gently stretch it up, fold it over, and then rotate the bowl 1/4 turn. Repeat this process 3 more times until you come to the point where you started. Cover the bowl and let the dough rest at room temperature for 30 minutes.
- After 30 minutes, repeat the stretch and fold process. Cover the bowl and let the dough rest at room temperature for another 30 minutes. Repeat this process 2 more times, for a total of 4 sets of stretch and folds spaced 30 minutes apart.
Step 4: First Rise/Complete Bulk Fermentation (4 to 8 hours wait time)
After the 4th stretch and fold, cover the bowl and let the dough rest at room temperature until puffed (roughly doubled in size), the top of the dough is slightly domed and bubbly, and the bottom looks spongy. At 74F room temperature, for me this usually takes around 6 to 7 hours, but it can anywhere from 4 to 8 hours depending on your conditions (such as how active your starter is, your kitchen’s temperature and humidity, etc.).
Step 5: Shape and Add the Brown Sugar Cinnamon Filling
- Once your dough is done with bulk fermentation, mix together all ingredients for the brown sugar cinnamon swirl in a medium bowl.
- Line a large bowl with a clean cotton tea towel, and sprinkle an even layer of flour across the towel.
- Lightly spritz your countertop with a little non-chlorinated water and wet your hands (I prefer to roll out my dough with water instead of flour). Scrape your dough out onto the dampened countertop and roughly shape it into a rectangle about 13 to 14 inches long by 8 to 9 inches wide (it doesn’t have to be perfect and you aren’t rolling it out here). Gently press the dough with your fingertips to get rid of excess gas bubbles. Evenly dollop on the brown sugar cinnamon mixture, leaving a border of about 1 inch all around. Fold your dough in thirds like a letter, then starting with one end, roll up the dough into a log. To get some surface tension, cup the dough with your hands and gently pull it towards you across the countertop a few times (because of the filling, don’t overdo it here).
- Place the dough (seam side up) into the prepared bowl. Cover with plastic wrap.
Step 6: Second Rise/Proof (1 to 4 hours at room temperature or 12 to 24 hours in the fridge wait time)
Let the dough rest until it’s properly proofed. You’ll know it’s properly proofed when it looks puffed and jiggles when you gently shake the bowl. Also, the poke test is helpful as a guideline; lightly flour your finger and the dough’s surface, and gently press your finger into the dough. If it springs back slowly (instead of springing back quickly or not at all), it’s ready to bake. You can let it proof at room temperature or cold proof in the fridge. At room temperature it’ll take 1 to 4 hours, and in the fridge around 12 to 24 hours.
Step 7: Preheat, Score, and Bake (1 hour wait time)
- An hour before you want to bake, put your Dutch oven (with the lid on) into the oven and preheat it to 450F. After preheating, take your dough out of the fridge, invert it onto a parchment paper-lined plate, and score the top. Use the parchment paper to carefully lift the dough up and place it into the Dutch oven (with the parchment still underneath it).
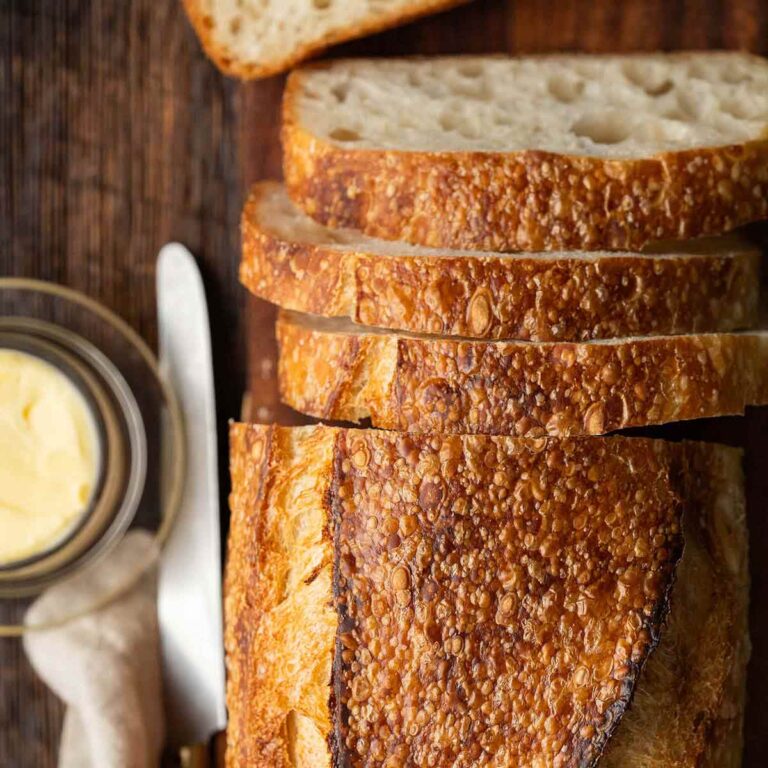
- Put the lid on and bake for 35 minutes, then remove the lid and bake until done, about 18 to 25 minutes more. The bread is done when it’s golden brown outside, sounds hollow when tapped on the bottom, and reaches an internal temperature of 205-210F.
Step 8: Cool and Slice
Transfer the bread to a wire rack and cool completely before slicing. This takes at least 6 hours, but overnight is better.
Best Baking Vessels for Sourdough Bread
Choosing the right baking vessel can impact your final loaf’s crust, rise, and overall texture. Here are some great options:
- Dutch Oven – This is my go-to choice, and IMHO the best option for trapping steam and creating a crispy, golden crust. My trusty cast-iron Dutch oven is where the sourdough magic happens in my kitchen!
- Cast Iron Combo Cooker – Similar to a Dutch oven, but allows for easier dough transfer.
- Bread Cloche – A ceramic dome that mimics a traditional bread oven for a great crust.
- Baking Stone with Steam – Preheated baking stone combined with a tray of water creates a steamy oven environment.
- Loaf Pan – Ideal for a sandwich-style sourdough. To try to get the outside as crusty as possible, cover it with foil for the first part of the bake.

Storage, Freezing & Reheating
Once it’s cool, store cinnamon raisin sourdough bread at room temperature in a bread bag or wrapped in a kitchen towel for up to 3 days.
To freeze sourdough slices, let the loaf cool fully before slicing. Arrange the slices in an even layer on a parchment paper-lined baking tray and freeze until solid. After that, pop the frozen slices into a freezer-safe bag for up to 3 months.
After freezing, for the best flavor and texture, I recommend toasting the slices right before eating. No worries if you forget to thaw it! You can reheat frozen sliced sourdough bread in a 425F oven for about 15 minutes, flipping each slice once halfway through.

Expert Tips For the Best Cinnamon Raisin Sourdough Bread Recipe
1) Hydrate the raisins. Soak the raisins to rehydrate them. This prevents them from drawing moisture from the dough.
2) Adjust the sweetness. You can add an extra tablespoon of honey for a sweeter loaf.
3) Prevent burnt raisins. Just like other inclusions when you’re baking sourdough, before baking, tuck raisins into the dough to avoid them burning on the crust.

Sourdough Cinnamon Raisin Bread FAQs
Absolutely! Chopped walnuts or pecans complement brown sugar, cinnamon, and raisins beautifully. Add up to 1 cup of chopped nuts at the same time you add the raisins.
Bulk fermentation is done when the dough has noticeably expanded, typically increasing in size by about 50 to 100%.
The top should look slightly domed and there should be visible bubbles on the surface.
The sides and bottom should have a light, airy texture, similar to a sponge.
If the dough is very stiff or hasn’t risen much, it may need more time.
The first indicator is the the dough jiggles like a bowl full of jelly when you gently shake it.
Another good way to tell if the dough is properly proofed is the poke test. To perform the poke test, lightly flour a finger and part of the dough’s surface. Gently press your finger into the dough. If the indentation springs back slowly but leaves a slight indentation, it’s ready to bake. If it springs back quickly, it needs more time; if it doesn’t spring back at all, it may be over-proofed.

Did You Make This recipe?
⭐️⭐️⭐️⭐️⭐️
Please leave a comment and star rating to let me know how it turned out. Thank you for your feedback and support!

Cinnamon Raisin Sourdough Bread Recipe
Email This Recipe
Get this recipe link emailed straight to your inbox!
Ingredients
To Feed Your Starter:
- 60 grams sourdough starter
- 60 grams unbleached all-purpose flour
- 60 grams non-chlorinated water
Dough:
- 125 grams ripe sourdough starter, once it’s active and bubbly, weigh 125 grams of the fed starter
- 350 grams non-chlorinated water, I use bottled water
- 42 grams honey
- 12 grams fine sea salt
- 500 grams unbleached bread flour
- 160 grams raisins, about 1 cup of raisins; plus boiling water for soaking
Cinnamon Brown Sugar Filling:
- 2 tablespoons unsalted butter, softened
- 6 tablespoons light brown sugar, lightly packed
- 1 tablespoon unbleached all-purpose flour
- 1 tablespoon ground cinnamon
- 1 teaspoon pure vanilla extract
- 1/8 teaspoon fine sea salt
Instructions
Feed Your Starter (4 to 12 hours wait time)
- Feed your starter so that it’s at peak when you’re planning to make the dough. Around 4 to 12 hours before you want to make the dough is the general timeframe, but you know how long it takes your starter to reach peak after a feeding, so go with that. To feed your starter, mix all ingredients together in a clean jar. Cover loosely and let it rest at room temperature until it peaks. This usually takes about 4 to 12 hours; I like to do this the night before I want to make the dough, right before I go to bed.
Mix the Dough and Soak the Raisins (30 minutes wait time)
- To make the dough, add the starter, water, and honey to a large bowl (with a clear bottom and sides so you can see the dough) and whisk until the starter and honey are fully dissolved. Whisk in the salt. Mix in the flour. The dough will be shaggy at this point (don’t knead it). Cover the bowl and let the dough rest at room temperature for 30 minutes.
- While the dough is resting, add the raisins and 1 cup of boiling water to a bowl. Make sure raisins are submerged, and soak 20 to 30 minutes.
Add the Raisins and Perform the Stretch and Folds (90 minutes wait time)
- After the dough has rested for 30 minutes, drain the raisins, gently pat them dry, and sprinkle them onto the dough.
- Wet your hands and perform your first set of stretch and folds. To do so, grab a piece of dough, gently stretch it up, fold it over, and then rotate the bowl 1/4 turn. Repeat this process 3 more times until you come to the point where you started. Cover the bowl and let the dough rest at room temperature for 30 minutes.
- After 30 minutes, repeat the stretch and fold process. Cover the bowl and let the dough rest at room temperature for another 30 minutes. Repeat this process 2 more times, for a total of 4 sets of stretch and folds spaced 30 minutes apart.
First Rise/Complete Bulk Fermentation (4 to 8 hours wait time)
- After the 4th stretch and fold, cover the bowl and let the dough rest at room temperature until puffed (roughly doubled in size), the top of the dough is slightly domed and bubbly, and the bottom looks spongy. At 74F room temperature, for me this usually takes around 6 to 7 hours, but it can anywhere from 4 to 8 hours depending on your conditions (such as how active your starter is, your kitchen’s temperature and humidity, etc.).
Shape and Add the Brown Sugar Cinnamon Filling
- Once your dough is done with bulk fermentation, mix together all ingredients for the brown sugar cinnamon swirl in a medium bowl.
- Line a large bowl with a clean cotton tea towel, and sprinkle an even layer of flour across the towel.
- Lightly spritz your countertop with a little non-chlorinated water and wet your hands (I prefer to roll out my dough with water instead of flour). Scrape your dough out onto the dampened countertop and roughly shape it into a rectangle about 13 to 14 inches long by 8 to 9 inches wide (it doesn’t have to be perfect and you aren’t rolling it out here). Gently press the dough with your fingertips to get rid of excess gas bubbles. Evenly dollop on the brown sugar cinnamon mixture, leaving a border of about 1 inch all around. Fold your dough in thirds like a letter, then starting with one end, roll up the dough into a log. To get some surface tension, cup the dough with your hands and gently pull it towards you across the countertop a few times (because of the filling, don’t overdo it here).
- Place the dough (seam side up) into the prepared bowl. Cover with plastic wrap.
Second Rise/Proof (1 to 4 hours at room temperature or 12 to 24 hours in the fridge wait time)
- Let the dough rest until it’s properly proofed. You’ll know it’s properly proofed when it looks puffed and jiggles when you gently shake the bowl. Also, the poke test is helpful as a guideline; lightly flour your finger and the dough’s surface, and gently press your finger into the dough. If it springs back slowly (instead of springing back quickly or not at all), it’s ready to bake. You can let it proof at room temperature or cold proof in the fridge. At room temperature it’ll take 1 to 4 hours, and in the fridge around 12 to 24 hours.
Preheat, Score, and Bake (1 hour wait time)
- An hour before you want to bake, put your Dutch oven (with the lid on) into the oven and preheat it to 450F. After preheating, take your dough out of the fridge, invert it onto a parchment paper-lined plate, and score the top. Use the parchment paper to carefully lift the dough up and place it into the Dutch oven (with the parchment still underneath it).
- Put the lid on and bake for 35 minutes, then remove the lid and bake until done, about 18 to 25 minutes more. The bread is done when it’s golden brown outside, sounds hollow when tapped on the bottom, and reaches an internal temperature of 205-210F.
Cool and Slice
- Transfer the bread to a wire rack and cool completely before slicing. This takes at least 6 hours, but overnight is better.
Notes
- Recipe Yield: This recipe makes 1 large loaf of bread, or about 16 servings. The nutritional information was calculated based on it yielding 16 servings.
- Storage: Once it’s cool, store cinnamon raisin sourdough bread at room temperature in a bread bag or wrapped in a kitchen towel for up to 3 days.
- Freezing: To freeze sourdough slices, let it fully cool and then slice it. Arrange the slices in an even layer on a parchment paper-lined baking tray and freeze until solid. After that, pop the frozen slices into a freezer-safe bag for up to 3 months.
- Reheating: After freezing, for the best flavor and texture, I recommend toasting the slices right before eating. No worries if you forget to thaw it! You can reheat frozen sliced sourdough bread in a 425F oven for about 15 minutes, flipping each slice once halfway through.
Nutrition