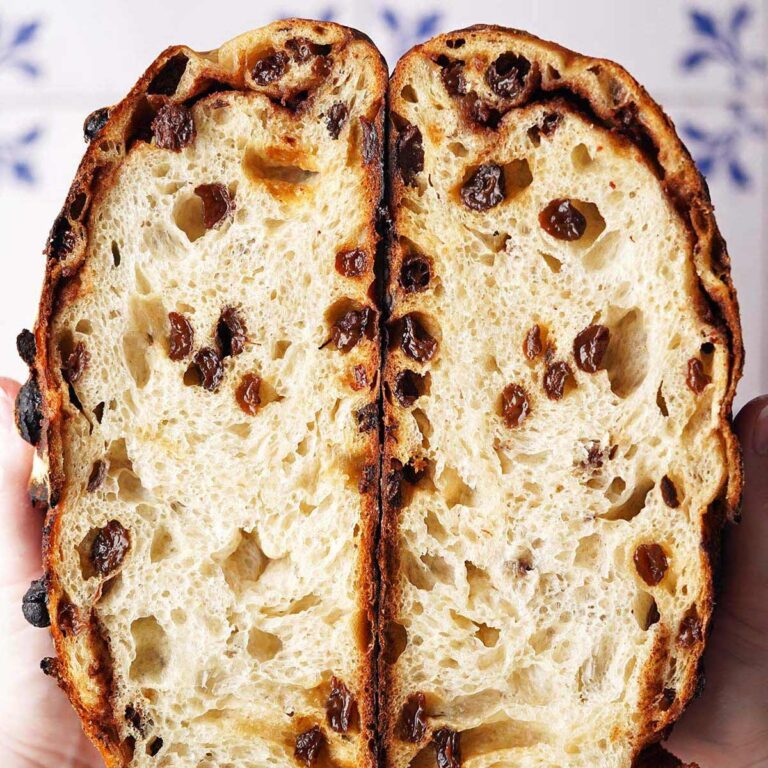
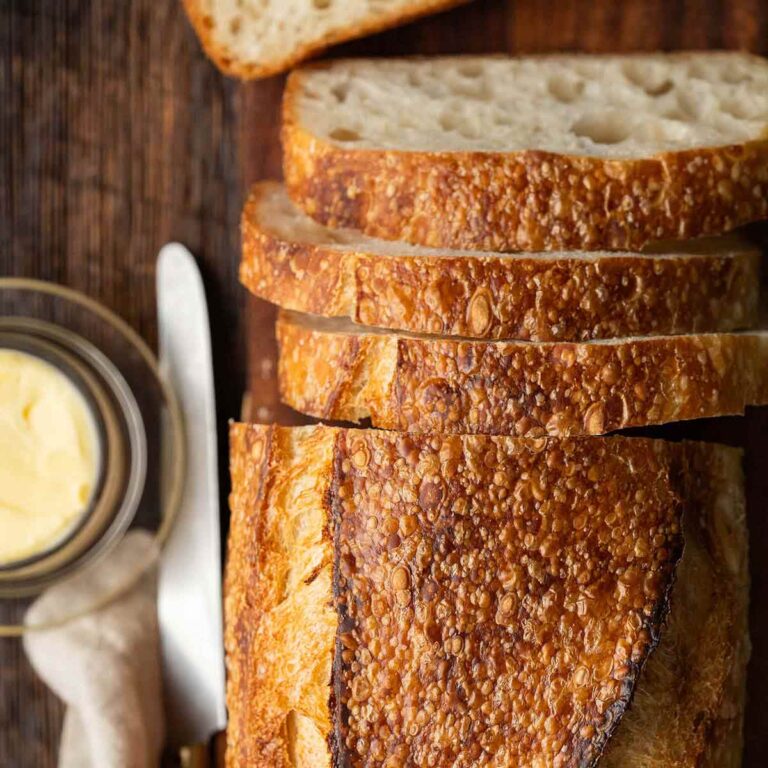
This sourdough brioche bread loaf balances the sweet, rich flavor of brioche with the tanginess of sourdough. Instead of being fluffy like traditional brioche, it’s soft with a tight crumb and slices beautifully for sandwiches or toast.

I grew up with tunafish and peanut butter and jelly sandwiches on Monks’ Bread. (If you’re from Buffalo, you probably know exactly what I’m talking about!) Trappist monks of the Abbey of Genesee in Western New York have been baking their bread since 1953. It’s an enriched bread made from scratch without artificial preservatives. Loaves are on the smaller side and thinly sliced, so it’s a great sandwich bread. This sourdough brioche sandwich loaf reminds me of that, what a trip down memory lane!
With this sourdough recipe, I wanted an enriched bread, but I didn’t want it light and fluffy like classic brioche. I wanted to be able to use it for sandwiches! To get a slidable brioche loaf, instead of going heavy on the enriching ingredients (eggs, butter, milk, and sugar), I added quite a bit less. Here you still get the rich, sweet, buttery flavor of brioche, but the tanginess of sourdough balances it beautifully. The texture is soft but not fluffy, and it has a tight crumb. It slices beautifully and is the perfect choice for sandwiches or toast. (On the other hand, if you’re looking for a leaner sourdough sandwich bread, try this recipe!)
What is Brioche?
Brioche is a type of French bread. It’s different from regular bread because it’s enriched with eggs, butter, milk, and sometimes sugar to yield a sweeter, richer, fluffier bread. Here we use wild yeast to leaven the bread with no added commercial yeast. The result is a lovely balanced hybrid of tangy sourdough + sweet, rich brioche!
Why You’ll Want This Recipe on Repeat
- It’s the perfect balance of rich, buttery brioche and tangy sourdough. It’s not overly sweet and also not too tangy, so it’ll work well for just about any sandwich you can dream up.
- Unlike regular brioche which is soft and fluffy, this bread is soft but has a tight crumb, so it’s ideal for slicing.
- This bread is easy to make with no special equipment needed and minimal attention. We don’t even knead it! I think you’ll be surprised at just how simple this is. Yes, it’s a long process, but that’s because we use a longer fermentation period so we don’t have to knead the dough. During fermentation, the bread babysits itself. This recipe really isn’t any harder to make than regular sourdough.
- Some sourdough brioche recipes supplement with commercial yeast, but here we only use wild yeast in sourdough starter to leaven the bread. This helps us get the best flavor and all the health benefits that come along with fermented bread.

Sourdough Brioche Bread Loaf Ingredients
INGREDIENTS EXPLAINED
Here the ingredients are explained and applicable substitutions are given. For the full recipe (with ingredient amounts), please see the recipe card below.
Ingredients to Feed Your Starter:
- Sourdough starter – Use mature, 100% hydration sourdough starter.
- Unbleached all-purpose flour – Use organic if possible, but definitely unbleached flour (all-purpose is fine).
- Non-chlorinated water – I use bottled spring water because the drinking water where I live is sometimes highly chlorinated.
Dough Ingredients:
- Ripe sourdough starter – Once your starter is fed, you’ll want to use it when it’s around its peak. I usually feed it around 10-11pm the night before I want to bake, and then I mix up my dough around 7-8am the next morning.
- Eggs, unsalted butter, whole milk, and sugar – These are the ingredients that “enrich” our brioche dough, giving it a sweeter, richer flavor, softer texture, and tighter, more uniform crumb than regular sourdough bread. The butter should be melted and cooled to around 100F. Additionally, the milk should be scalded and cooled to around 100F. The eggs should be at room temperature.
- Non-chlorinated water – I use bottled spring water at room temperature. However, it can be slightly warm to encourage fermentation (not hotter than 95 to 100F).
- Fine sea salt – So our bread isn’t bland.
- Unbleached bread flour – With its higher protein content than all-purpose flour, bread flour lends a deliciously chewy texture to this loaf.
- Butter – To grease the pan (salted or unsalted butter will work fine).
- Egg wash – For brushing on top of the loaf before baking to help create a gorgeous golden brown crust. To make egg wash, whisk together 1 egg with about 1 tablespoon of water.

How is This Sourdough Brioche Sandwich Loaf Different Than Regular Sourdough Brioche Bread?
For starters, we use less of the enriching ingredients (eggs, butter, milk, and sugar). It’s not a lean dough (like regular sourdough), but it’s not as rich, sweet, and fluffy as regular brioche either.
This loaf falls somewhere in the middle. It’s richer and less sour than regular sourdough but not as sweet as classic brioche, so it lends itself equally well to either a turkey sandwich or a pb&j. And it has a soft, uniform crumb that makes it perfect for slicing!
Example Bakers Schedule For This Recipe
Use this as a general timeframe, but note that exact times can vary.
| Day | Time | What To Do |
| Day 1 | 11pm (TIP: It doesn’t have to be 11pm exactly, just feed it right before you go to bed.) | Feed your starter. |
| Day 2 | 7:30am | Mix the dough. |
| 7:30am-9:30am | Perform 4 sets of stretch and folds spaced 30 minutes apart. | |
| 9:30am-4:30pm | Bulk fermentation at room temperature. | |
| 4:30pm-7:30am (the next morning) | Bulk fermentation in the fridge. (TIP: It doesn’t have to be 15 hours exactly; 12 to 24 hours is fine.) | |
| Day 3 | 7:30am | Shape. |
| 7:40am-4:40pm | Second rise/proof at room temperature. | |
| 4:10pm | Preheat oven. | |
| 4:40pm-5:20pm | Bake. |

Step-by-Step Instructions
Step 1: Feed Your Starter (4 to 12 hours wait time)
Feed your starter so that it’s at peak when you’re planning to make the dough. Around 4 to 12 hours before you want to make the dough is the general timeframe, but you know how long it takes your starter to reach peak after a feeding, so go with that.
To feed your starter, mix all ingredients together in a clean jar. Cover loosely and let it rest at room temperature until it peaks. This usually takes about 4 to 12 hours; I like to do this the night before I want to make the dough, right before I go to bed.
Step 2: Make the Dough (30 minutes wait time)
- Add the active starter, eggs, melted butter, scalded milk, sugar, and salt to a large bowl or container (glass or clear so you can see through the sides and bottom) and whisk to combine. Add the flour and stir to form a shaggy dough (don’t knead it; some dry spots are fine).
- Cover the container and let it sit at room temperature for 30 minutes.
Perform the Stretch and Folds (90 minutes wait time)
- Wet your hands and perform your first set of stretch and folds. To do so, grab a piece of dough, gently stretch it up, fold it over, and then rotate the bowl 1/4 turn. Repeat this process 7 more times until you’ve gone around the bowl twice. Cover the bowl and let the dough rest at room temperature for 30 minutes.
- After 30 minutes, repeat the stretch and fold process. Cover the bowl and let the dough rest at room temperature for another 30 minutes. Repeat this process 2 more times, for a total of 4 sets of stretch and folds spaced 30 minutes apart. (TIP: To help with gluten development, if you have the time, you can continue with 2 more sets of stretch and folds after this spaced 30 minutes apart. That time counts towards the 6-hour bulk fermentation in the next step.)
First Rise/Complete Bulk Fermentation (6 hours wait time at room temperature, and then 12 to 24 hours in the fridge)
- After the 4th set of stretch and folds, cover the bowl and let the dough rest at room temperature until puffed, about 6 hours.
- After 6 hours at room temperature, pop the dough into the fridge for 12 to 24 hours more. At the end of this step, the dough should be puffed to about 50-75% larger than its original size; the top of the dough should be slightly domed and bubbly; additionally, the bottom of the dough should look spongy.
Shape
- Butter the inside of a 9 by 5-inch loaf pan.
- Scrape your dough out onto a dry work surface, and gently shape the dough into a rectangle. Fold the rectangle up like a letter, and then roll it up from one of the short ends. To get some surface tension, gently pull the loaf towards you across the countertop a couple times.
- Place the dough (seam side down) into the prepared loaf pan. Cover with plastic wrap.
Proof (8 hours at room temperature)
Let the dough rest at room temperature until it’s properly proofed, about 8 hours. You’ll know it’s properly proofed when it looks puffed (it’ll be roughly doubled in size) and jiggles when you gently shake the bowl. Also, the poke test is helpful as a guideline; lightly flour your finger and the dough’s surface, and gently press your finger into the dough. If it springs back slowly (instead of springing back quickly or not at all), it’s ready to bake.
Preheat, Score, and Bake
- Half an hour before you want to bake, preheat your oven to 350F.
- Lightly brush the top of the loaf with egg wash.
- Bake (uncovered) until done, about 40 to 55 minutes. (Check the bread at the 35-minute mark and if the top is getting too golden before it’s fully baked, cover the top with foil and continue baking.) The bread is done when it’s golden outside, sounds hollow when tapped on the bottom, and reaches an internal temperature of 190-200F.
Cool and Slice
Transfer the bread to a wire rack and cool completely before slicing. (Don’t be tempted to slice into it while it’s hot! This will give you one great slice but the rest of the loaf will be gummy.) Cooling takes at least 4 to 6 hours, but overnight is better.
Storage, Freezing, and Reheating
Once it’s cool, store this bread at room temperature in a bread bag or wrapped in a kitchen towel for up to 3 days.
To freeze the slices, let the loaf cool fully before slicing. Arrange the slices in an even layer on a parchment paper-lined baking tray and freeze until solid. After that, pop the frozen slices into a freezer-safe bag for up to 3 months.
You can reheat frozen bread slices in a 425F oven for about 10 to 15 minutes (no need to thaw them first), flipping each slice once halfway through.

Expert Tips For the Best Sourdough Brioche Sandwich Loaf
1. Because of the butter content in brioche, it’s easiest to shape this loaf while the dough is cold straight from the fridge so it’s not too soft and sticky.
2. Also because we’re shaping the dough when it’s cold and firm, we don’t need to add additional flour (or water) for shaping. I find a dry work surface works well here.
Frequently Asked Questions
Kneading develops the gluten structure, resulting in chewy, light, and airy bread. With this recipe, there’s no need for kneading to develop the gluten for three reasons: 1) the dough is higher hydration, 2) we “stretch and fold” the dough, and 3) we let the dough ferment longer. A longer fermentation period (especially with higher hydration dough) allows the enzymes in the flour to properly break down the proteins and develop gluten.
With its sweet, rich flavor and fluffy texture, regular brioche lends itself to being eaten as-is! Of course you can also make it into things like French toast or bread pudding. Personally, I’m not a fan of making regular brioche into sandwiches because the bread is too fluffy to hold up well, and because the flavor is too sweet for anything other than a sweet sandwich (like Nutella and banana or peanut butter and jelly).
On the other hand, I developed this brioche bread loaf specifically to use for sandwiches and toast. It’s less rich and sweet (which means it’s great for savory sandwiches like turkey, roast beef, tuna, etc. as well as sweet sandwiches), and its uniform crumb makes it perfect for nice clean slices that hold up well with all your favorite sandwich fillings.

Did You Make This recipe?
⭐️⭐️⭐️⭐️⭐️
Please leave a comment and star rating to let me know how it turned out. Thank you for your feedback and support!

Sourdough Brioche Sandwich Loaf Recipe
Equipment
Email This Recipe
Get this recipe link emailed straight to your inbox!
Ingredients
To Feed Your Starter:
- 60 grams sourdough starter
- 60 grams unbleached all-purpose flour
- 60 grams non-chlorinated water
Dough:
- 125 grams ripe sourdough starter,
once it’s active and bubbly, weigh 125 grams of the fed starter
- 2 large eggs, at room temperature
- 1/2 cup unsalted butter, melted and cooled slightly (around 100F)
- 135 g whole milk, scaled and cooled slightly (around 100F)
- 3 tablespoons granulated white sugar
- 13 grams fine sea salt
- 475 grams unbleached bread flour
- Butter, for the pan
- Egg wash, for brushing on top before baking
Instructions
Feed Your Starter (4 to 12 hours wait time)
- Feed your starter so that it’s at peak when you’re planning to make the dough. Around 4 to 12 hours before you want to make the dough is the general timeframe, but you know how long it takes your starter to reach peak after a feeding, so go with that. To feed your starter, mix all ingredients together in a clean jar. Cover loosely and let it rest at room temperature until it peaks. This usually takes about 4 to 12 hours; I like to do this the night before I want to make the dough, right before I go to bed.
Make the Dough (30 minutes wait time)
- Add the active starter, eggs, melted butter, scalded milk, sugar, and salt to a large bowl or container (glass or clear so you can see through the sides and bottom) and whisk to combine. Add the flour and stir to form a shaggy dough (don’t knead it; some dry spots are fine).
- Cover the container and let it sit at room temperature for 30 minutes.
Perform the Stretch and Folds (90 minutes wait time)
- Wet your hands and perform your first set of stretch and folds. To do so, grab a piece of dough, gently stretch it up, fold it over, and then rotate the bowl 1/4 turn. Repeat this process 7 more times until you’ve gone around the bowl twice. Cover the bowl and let the dough rest at room temperature for 30 minutes.
- After 30 minutes, repeat the stretch and fold process. Cover the bowl and let the dough rest at room temperature for another 30 minutes. Repeat this process 2 more times, for a total of 4 sets of stretch and folds spaced 30 minutes apart. (TIP: To help with gluten development, if you have the time, you can continue with 2 more sets of stretch and folds after this spaced 30 minutes apart. That time counts towards the 6-hour bulk fermentation in the next step.)
First Rise/Complete Bulk Fermentation (6 hours wait time at room temperature, and then 12 to 24 hours in the fridge)
- After the 4th set of stretch and folds, cover the bowl and let the dough rest at room temperature until puffed, about 6 hours.
- After 6 hours at room temperature, pop the dough into the fridge for 12 to 24 hours more. At the end of this step, the dough should be puffed to about 50-75% larger than its original size; the top of the dough should be slightly domed and bubbly; additionally, the bottom of the dough should look spongy.
Shape
- Butter the inside of a 9 by 5-inch loaf pan.
- Scrape your dough out onto a dry work surface, and gently shape the dough into a rectangle. Fold the rectangle up like a letter, and then roll it up from one of the short ends. To get some surface tension, gently pull the loaf towards you across the countertop a couple times.
- Place the dough (seam side down) into the prepared loaf pan. Cover with plastic wrap.
Proof (8 hours at room temperature)
- Let the dough rest at room temperature until it’s properly proofed, about 8 hours. You’ll know it’s properly proofed when it looks puffed (it’ll be roughly doubled in size) and jiggles when you gently shake the bowl. Also, the poke test is helpful as a guideline; lightly flour your finger and the dough’s surface, and gently press your finger into the dough. If it springs back slowly (instead of springing back quickly or not at all), it’s ready to bake.
Preheat, Score, and Bake
- Half an hour before you want to bake, preheat your oven to 350F.
- Lightly brush the top of the loaf with egg wash. Bake (uncovered) until done, about 40 to 55 minutes. (Check the bread at the 35-minute mark and if the top is getting too golden before it’s fully baked, cover the top with foil and continue baking.) The bread is done when it’s golden outside, sounds hollow when tapped on the bottom, and reaches an internal temperature of 190-200F.
Cool and Slice
- Transfer the bread to a wire rack and cool completely before slicing. (Don’t be tempted to slice into it while it’s hot! This will give you one great slice but the rest of the loaf will be gummy.) Cooling takes at least 4 to 6 hours, but overnight is better.
Notes
- Recipe Yield: This recipe makes 1 large loaf of bread, or about 16 servings. The nutritional information was calculated based on it yielding 16 servings.
- Storage: Once it’s cool, store this bread at room temperature in a bread bag or wrapped in a kitchen towel for up to 3 days.
- Freezing and Reheating: To freeze the slices, let the loaf cool fully before slicing. Arrange the slices in an even layer on a parchment paper-lined baking tray and freeze until solid. After that, pop the frozen slices into a freezer-safe bag for up to 3 months. You can reheat frozen bread slices in a 425F oven for about 10 to 15 minutes (no need to thaw them first), flipping each slice once halfway through.
Nutrition